
By James Nolan — Gymnase Tips senior trainer. Updated June 2026.
TL;DR — Can You Build a Strong Back With Calisthenics Alone?
A calisthenics back workout uses bodyweight pulling — pull-ups, chin-ups, Australian rows, scapular pulls and front-lever progressions — to train lats, traps, rhomboids and erectors without weights. Pair vertical and horizontal pulls 2–3 times per week, then progress via tempo, ROM and unilateral variations. Done right, bodyweight pulling builds a back that holds its own against barbell-trained physiques for the first two to three years of training.
The 8 best calisthenics back exercises:
- Pull-Up
- Chin-Up
- Australian (Inverted) Row
- Scapular Pull-Up
- Archer Pull-Up
- Front Lever Row (tuck → straddle → full)
- Superman / Reverse Snow Angel
- Prone Y-T-W
What a Calisthenics Back Workout Trains
The back is six layers of muscle doing different jobs, and a complete routine must hit all of them — not just the two that show up in a mirror.
- Latissimus dorsi — the V-taper muscle. Drives shoulder adduction and extension. Built by vertical pulls (pull-ups, chin-ups, front-lever work).
- Trapezius (upper, middle, lower) — thickness from the neck down to mid-back. Upper traps shrug; mid and lower traps retract and depress the scapula. Horizontal pulls and scapular control work train the mid and lower fibres most people neglect.
- Rhomboids — the small muscles between the shoulder blades responsible for posture and scap retraction. Rows hit them hardest.
- Teres major and posterior deltoid — assist the lats in adduction; rear delts grow from horizontal pulling at chest height.
- Erector spinae — the spinal column’s stabiliser. Trained isometrically through holds (front lever, supermans) and dynamically through hip extension.
- Grip and forearms — non-negotiable. If your hands fail before your back does, you cannot overload the back. Dead hangs and high-rep pull work fix this fast (see our grip strength exercises guide).
The split that matters most: vertical pull (loading the lats overhead) versus horizontal pull (loading the mid-back at chest height). Most home routines run 80% vertical and underdevelop the rhomboids and mid-traps. We’ll fix that below.
Equipment — With a Bar vs No Pull-Up Bar
The minimum kit for a real calisthenics back workout is a pull-up bar. A $25 doorframe bar unlocks the entire vertical-pull catalogue. If you cannot install one, here is the substitute kit and what each item replaces:
- Sturdy table or two chairs with a broom handle — covers Australian rows (your horizontal pull).
- Door with a thick towel looped over the top — door-frame towel row, replaces low-row variations and trains grip hard.
- Backpack loaded with books or water bottles — bent-over row substitute, plus added load for supermans and Y-T-Ws.
- Floor space — supermans, reverse snow angels, prone Y-T-Ws, bird dogs.
A bar lets you train the lats overhead under bodyweight load — there is no perfect substitute for that. But a no-bar routine still builds a strong, dense mid-back. The dedicated no-bar routine is below.
The 8 Best Calisthenics Back Exercises
Each move below includes target muscle, the form cues I drill with clients, the one mistake that derails the rep, and how to scale up or down.
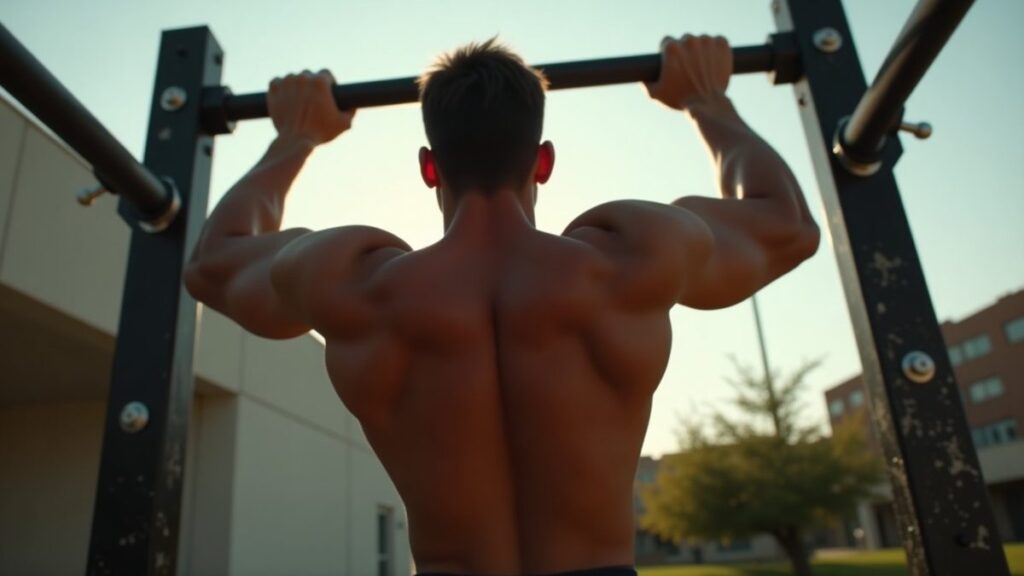
1. Pull-Up
The king of vertical pulling and the single best bodyweight exercise for back width. Hits the lats most directly, plus rear delts, mid-traps, and biceps as assistance. Tier: Intermediate.
- Hang from a bar with an overhand grip slightly wider than shoulders.
- Set the scapula first — pull the shoulder blades down and back before the arms move.
- Pull until your chin clears the bar with chest leading.
- Lower under control to a full dead hang.
Common mistake: kipping and cutting reps short. A pull-up that doesn’t return to a dead hang and clear the bar is a half-rep. Three strict reps beat ten kipped ones for hypertrophy.
A 2014 EMG analysis by Schoenfeld and colleagues in the Journal of Strength and Conditioning Research found that pull-up grip width and orientation produce broadly similar latissimus activation, meaning the strict pull-up — not the wide grip specifically — is what drives lat recruitment (Source: Schoenfeld et al., JSCR, 2014).
Regression: band-assisted pull-up, or 5-second negatives from a jump. Progression: archer pull-up, then weighted pull-up via backpack.
2. Chin-Up
The underhand cousin of the pull-up. Easier for most lifters because of stronger bicep contribution, and arguably the best bodyweight movement for the lower lats and overall back recruitment. Tier: Beginner–Intermediate.
- Grip the bar underhand, hands shoulder-width.
- Retract the scapula before pulling.
- Drive elbows down and back to pull chest toward the bar.
- Lower slowly to a dead hang.
Common mistake: elbows flaring forward and no scap retraction. The chin-up becomes a bicep curl with extra steps. Cue: “drive your elbows into your back pockets.”
Regression: negatives from a chair, 5 seconds down. Progression: slow-tempo chin-ups (3-1-X-1), then archer chin-ups.
3. Australian (Inverted) Row
The horizontal pull most calisthenics routines underuse — and the reason most home-trained backs lack the thickness between the shoulder blades. Bodyweight rows absolutely build back muscle when programmed at sufficient volume. Tier: Beginner.
- Hang under a low bar (or sturdy table) with body straight, heels on the floor.
- Retract the scaps, then pull the chest — not the belly — to the bar.
- Pause one second at the top.
- Lower under control.
Common mistake: hips sagging and pulling to the belly instead of the sternum. The lift becomes a hip-flexor brace with a partial row tacked on. Cue: “glutes squeezed, chest to bar.”
Regression: feet on the floor with knees bent (incline row). Progression: feet elevated on a chair, then tuck front-lever row.
4. Scapular Pull-Up
The most undervalued back-strengthening exercise in calisthenics. It teaches scapular depression — the foundation of every pull-up rep — and builds the lower traps that everyone neglects. Tier: Beginner.
- Hang from a bar with arms fully extended.
- Without bending the elbows, pull the shoulder blades down and back.
- Your body rises 2–4 inches.
- Hold one second at the top, lower slowly.
Common mistake: bending the elbows. This is a shrug-in-reverse, not a pull. If your arms bend at all, you’ve switched exercises. Lock the elbows straight and move from the shoulder blades only.
Regression: feet on a chair to reduce load. Progression: 3-second pause at the top, then add weighted vest or backpack.
5. Archer Pull-Up
The bridge between two-arm pull-ups and one-arm pull-ups, and a brutal muscle-building back movement. Each rep shifts roughly 70% of bodyweight onto the working side. Tier: Advanced.
- Grip the bar wide.
- Pull up toward one hand while the opposite arm stays straight along the bar.
- Chin rises beside the working hand, not centred.
- Lower under control, alternate sides.
Common mistake: pushing off the straight arm and drifting toward the centre. The working side never gets the unilateral load that makes this exercise worth doing. Cue: “stay stacked over the working hand.”
Regression: typewriter pull-up at the top of the rep only. Progression: one-arm assisted pull-up using a towel for the support hand.
6. Front Lever Row (tuck → straddle → full)
The most advanced strength-building back exercise on this list. Combines the isometric demand of a front lever with the dynamic pull of a row. Develops a back that looks carved from stone. Tier: Advanced.
- Start in a tuck front lever (knees to chest, body horizontal, facing up).
- Maintaining the horizontal body line, pull the bar to your chest.
- Lower to full arm extension while holding position.
- Progress to straddle, then full front lever row.
Common mistake: hips dropping and kipping the body up. The moment the hips fall, the lats stop loading isometrically and it becomes a sloppy row. Cue: “hollow body, ribs down, hips up to bar line.”
Regression: tuck front-lever hold for time only — no row. Progression: straddle front-lever row, then full lever row.
7. Superman / Reverse Snow Angel
The lower-back strengthening exercise that prevents the spinal-erector weakness most lifters carry. Cheap, no equipment, brutally effective for erector and posterior-chain endurance. Tier: Beginner.
- Lie face-down, arms overhead, legs straight.
- Lift arms, chest and legs off the floor simultaneously.
- From the lifted position, sweep arms from overhead to hips and back (“snow angel”).
- Keep the gaze down — neutral neck.
Common mistake: cranking the neck up to look forward. This compresses the cervical spine and trains the wrong reflex. Cue: “eyes on the floor, lift from the upper back.”
Regression: lift arms only, then legs only, alternating reps. Progression: add a 2-second hold at the top, then load with a light backpack.
8. Prone Y-T-W
Targets the mid-trap, lower trap, and rear delt — the postural muscles that bodyweight pulls alone underdevelop. This is the secret weapon for a thick, balanced upper back. Tier: Beginner.
- Lie face-down, arms extended overhead in a “Y” shape, thumbs up.
- Lift the arms a few inches off the floor; hold one second.
- Move arms to “T” position (straight out from shoulders), lift, hold.
- Move to “W” (elbows bent, hands beside ears), lift, hold.
Common mistake: using momentum to swing the arms up instead of squeezing the shoulder blades. The traps stop firing the moment momentum takes over. Cue: “scaps move first, hands follow.”
Regression: one letter at a time, longer rest between. Progression: hold a light water bottle in each hand; 3-second hold per letter.
Master Comparison Table — All 8 Moves at a Glance
| Exercise | Tier | Primary Muscle | Grip / Setup | Sets × Reps | Regression | Progression |
|---|---|---|---|---|---|---|
| Pull-Up | Intermediate | Lats | Overhand, shoulder-wide+ | 4 × 5–10 | Band-assisted / negatives | Archer → weighted |
| Chin-Up | Beginner–Int. | Lats, biceps | Underhand, shoulder-wide | 3 × 6–12 | Negatives off chair | Slow tempo → archer chin |
| Australian Row | Beginner | Rhomboids, mid-trap | Low bar, body horizontal | 4 × 10–15 | Feet on floor, bent knees | Feet elevated → tuck FL row |
| Scapular Pull-Up | Beginner | Lower trap | Overhand dead hang | 3 × 8–12 | Feet on chair | 3-sec pause → weighted |
| Archer Pull-Up | Advanced | Lats (unilateral) | Wide overhand | 3 × 4–6 / side | Typewriter at top | One-arm assisted |
| Front Lever Row | Advanced | Lats, core | Overhand, body horizontal | 3 × 4–6 | Tuck hold only | Straddle → full row |
| Superman | Beginner | Erectors | Prone, floor | 3 × 10–15 | Arms or legs only | 2-sec hold, backpack |
| Prone Y-T-W | Beginner | Mid/lower trap | Prone, thumbs up | 3 × 8 / letter | One letter at a time | 3-sec hold, light load |
Vertical vs Horizontal Pull — The Balance Most Routines Miss
Pull-up-only routines build wide lats and underdeveloped mid-backs. Here’s why, and the fix.
Vertical pulls (pull-ups, chin-ups, front lever) load shoulder extension and adduction — the lats’ primary jobs. Horizontal pulls (Australian rows, front-lever rows, bent-over rows) load scapular retraction — the rhomboids’ and mid-traps’ primary job. EMG research from Schoenfeld and colleagues confirmed that different pulling angles preferentially recruit different segments of the back, which is why grip and angle variety beats grinding one variation (Source: Schoenfeld et al., JSCR, 2014).
The prescription: a 1:1 weekly ratio of vertical to horizontal pulling volume. If your back day has 16 sets of pull-ups and chin-ups, it needs 16 sets of rows. Most lifters run 4:1 in the wrong direction and wonder why their back is wide but flat.
In practice: alternate sessions. Session A leans vertical (pull-ups, chin-ups, archer); Session B leans horizontal (Australian rows, front-lever rows, Y-T-Ws). Across the week, the volume balances.
No Pull-Up Bar? The Full No-Equipment Back Routine
A real bodyweight workout for back muscles is possible without a bar — it just leans horizontal and isometric. This is the routine I prescribe for clients training in hotels or apartments where drilling a bar isn’t an option.
Run the routine twice a week. 35–40 minutes.
| # | Exercise | Sets × Reps | Rest | Setup |
|---|---|---|---|---|
| 1 | Door-frame towel row | 4 × 12 | 75 sec | Towel looped over closed door, lean back |
| 2 | Sturdy-table inverted row | 4 × 10–15 | 90 sec | Under a heavy table, body straight |
| 3 | Backpack bent-over row | 4 × 12 | 60 sec | Loaded backpack, hinge at hips |
| 4 | Superman + snow angel complex | 3 × 12 | 45 sec | Floor, prone |
| 5 | Prone Y-T-W | 3 × 8 / letter | 45 sec | Floor, thumbs up |
| 6 | Bird dog | 3 × 10 / side | 30 sec | Quadruped, opposite arm/leg |
This is enough stimulus to build a visibly stronger mid-back in 8–12 weeks. What it cannot replace is direct overhead lat loading — for that, you need a bar.
How to Progress Without Adding Weight
The biggest myth in calisthenics is that you run out of stimulus once a movement gets easy. You don’t — you run out of imagination. Seven levers add intensity without touching a weight, and each one stacks on the others.
- Tempo manipulation. Slow the eccentric to 3 or 5 seconds. A 5-second negative on a pull-up turns 5 strict reps into a brutal set with double the time under tension per rep. ACE’s coaching guidance recommends slower 3-second-plus eccentric phases specifically to drive mechanical strain and hypertrophy when adding external load isn’t an option (Source: ACE Fitness, 2024). A 3-1-X-1 tempo (3 down, 1 pause, explode up, 1 reset) doubles training stimulus per rep.
- Increased range of motion. Use rings or parallettes to drop into a deeper bottom position. Deficit pull-ups allow the chest to clear the bar — more ROM, more recruitment.
- Unilateral shift. Move from two-arm to one-arm progressions: archer pull-up, typewriter pull-up, one-arm assisted pull-up. Each shift roughly doubles per-limb load without adding external weight.
- Mechanical drop sets. Start with the hardest variation (archer pull-up) and drop to easier variations (pull-up → chin-up → Australian row) without resting. Same muscle, fresh leverage every drop.
- Density. EMOM (every minute on the minute) sets — 5 pull-ups at the top of every minute for 10 minutes — turn 50 reps into a metabolic finisher.
- Isometric holds. Top-of-the-pull-up hold for 10 seconds, L-sit pull-up hold, dead hang for 60 seconds. Isometrics build strength at the position they’re held in.
- Leverage / front-lever ladder. Tuck → advanced tuck → straddle → full front lever. Each progression increases the lever arm and the load the back has to stabilise.
What 12 weeks of this looked like for me. Week 1: 3 strict pull-ups with a kip in the third rep. Week 4: 6 strict reps, no kip. Week 8: 8 reps plus a 5-second top hold. Week 12: 10 strict reps and a tuck front-lever row for 4 reps. Zero added weight. Just tempo, ROM, and unilateral progression. The lats grew visibly in the second half of that block — month one was strength, months two and three were size.
The 4-Week A/B Calisthenics Back Routine
Run two sessions per week with at least 48 hours between. Session A is vertical-pull dominant; Session B is horizontal-pull dominant. Together they hit the 1:1 ratio that builds a balanced back.
Session A — Vertical Pull (e.g., Monday)
| Exercise | Sets × Reps × Tempo | Rest | RPE | Progression cue |
|---|---|---|---|---|
| Scapular pull-up | 2 × 8 × 2-1-1-1 | 60 sec | 6 | Warm-up — full ROM |
| Pull-up | 4 × 5–8 × 3-1-X-1 | 120 sec | 8 | Add 1 rep when you hit top of range |
| Chin-up | 3 × 6–10 × 3-0-X-1 | 90 sec | 8 | Slow eccentric first |
| Archer pull-up (or assisted) | 3 × 4–6 / side | 120 sec | 8–9 | Stay stacked over working hand |
| Front lever progression hold | 3 × 10–20 sec | 90 sec | 8 | Hold tuck before straddle |
| Prone Y-T-W | 2 × 8 / letter | 45 sec | 6 | Slow, no momentum |
Session B — Horizontal Pull (e.g., Thursday)
| Exercise | Sets × Reps × Tempo | Rest | RPE | Progression cue |
|---|---|---|---|---|
| Australian row | 4 × 10–15 × 2-1-1-1 | 90 sec | 8 | Pause 1 sec at top |
| Feet-elevated Australian row | 3 × 8–12 × 3-1-X-1 | 90 sec | 8 | Slow eccentric |
| Tuck front-lever row | 3 × 5–8 × 2-0-X-0 | 120 sec | 8–9 | Hips up to bar line |
| Chin-up (volume work) | 3 × max-2 reps | 90 sec | 7 | Stop 2 reps shy of failure |
| Superman + snow angel | 3 × 12 | 45 sec | 6 | Eyes down, lift from upper back |
| Dead hang | 3 × 30–60 sec | 60 sec | 7 | Grip + decompression finisher |
Week-by-week progression:
- Week 1 — Establish. Hit the low end of every rep range. Lock form. Record every set.
- Week 2 — Add reps. Add 1–2 reps per working set on anything you finished at the low end.
- Week 3 — Slow the eccentric. 5-second descent on pull-ups and chin-ups. Top of every range.
- Week 4 — Add a set or graduate. Add a fifth set on the main lift, or progress to the next variation (chin-up → archer chin, tuck FL row → straddle FL row).
Calisthenics vs Weighted Back Training — Honest Comparison
| Factor | Calisthenics back | Weighted back (rows / deadlifts / pulldowns) |
|---|---|---|
| Hypertrophy potential | High for 2–3 years; ceiling exists | Effectively unlimited with progressive load |
| Strength ceiling | Front lever / one-arm pull-up territory | Higher — you can keep adding plates |
| Joint load | Lower (no spinal compression) | Higher, especially deadlift |
| Equipment cost | $0–$30 (bar) | $300+ (rack, bar, plates) or gym membership |
| Skill carryover | Excellent — bar work, climbing, gymnastics | Limited outside the gym |
| Grip demand | Very high — every rep is a grip rep | Moderate (straps available) |
| Time efficiency | High — minimal setup | Moderate — plate changes, rack time |
| Best for | Mobility, relative strength, skill, home training | Maximum mass and absolute strength |
The honest answer: train both if you have access. For the first 2–3 years of training, calisthenics builds 90% of the back a barbell would. After that, adding weighted pulls and barbell rows extends progression.
Common Mistakes That Kill Back Progress
The form mistakes are listed per-exercise above. The programming mistakes are what kill long-term progress:
- Training only vertical. Pull-up routines without rows produce wide, flat backs. Run 1:1 vertical-to-horizontal volume.
- Never progressing past pull-ups. If you can do 10 strict pull-ups and you’re still doing 3 × 10 every session, you stopped progressing six months ago. Slow the tempo, add ROM, go unilateral, or move to front-lever work.
- Ignoring scapular control. Scap pulls and Y-T-Ws look easy and feel boring. They’re the reason advanced trainees keep their shoulders healthy and keep adding pull-up reps.
- Training back daily. Back muscles need 48+ hours to recover under hypertrophy loading. Two to three quality sessions per week beats five mediocre ones.
Calisthenics Back Workout FAQ
Can you build a big back with calisthenics alone?
Yes — for the first 2–3 years of training. Bodyweight pulls scale to extreme difficulty (one-arm pull-ups, front lever, archer variations) before the stimulus runs out. Past that point, weighted vests or transitioning to barbell rows extends progression. Most non-competitive lifters never hit the calisthenics ceiling.
How many days a week should I train back with calisthenics?
Two sessions per week is the sweet spot for hypertrophy, with 48–72 hours between. Three sessions work for advanced trainees splitting volume across light, moderate, and heavy days. Daily pull-up grease-the-groove practice can add reps fast but won’t drive size on its own.
What is the best calisthenics exercise for back thickness vs width?
For width, the pull-up — overhead vertical pulling loads the lats through their full shoulder-adduction range. For thickness, the Australian row or front-lever row — horizontal pulling drives mid-trap and rhomboid hypertrophy. Run both in a 1:1 ratio across the week.
Are pull-ups alone enough for a complete back?
No. Pull-ups build the lats and biceps but leave the rhomboids, mid-traps, and rear delts underdeveloped. Add horizontal pulls (rows) and scapular control work (scap pulls, Y-T-Ws). A complete back needs vertical, horizontal, and scapular work.
How do I train back without a pull-up bar?
Use Australian rows under a sturdy table, door-frame towel rows, backpack bent-over rows, supermans, prone Y-T-Ws, and bird dogs. Run 6 exercises across 35–40 minutes, twice per week. You’ll build a strong mid-back, but direct overhead lat loading requires a bar.
Pull-ups vs chin-ups — which is better for back?
Both — they hit slightly different angles. Pull-ups (overhand) bias upper lats and mid-traps; chin-ups (underhand) bias lower lats and load biceps harder. EMG comparison shows similar overall lat recruitment between the two, so run both. Most balanced routines alternate them across the week.
How long until I see back growth from bodyweight training?
Strength gains show up at 2–4 weeks (more reps, cleaner form). Visible muscle growth typically takes 8–12 weeks of consistent training with proper progression. Lat width is usually the first visible change; mid-back thickness lags by another 4–8 weeks.
Do Australian rows actually build back muscle?
Yes — they’re one of the most underrated horizontal pulls in calisthenics. Programmed at 4 × 10–15 with slow tempo and chest-to-bar contact, they drive serious mid-trap and rhomboid growth. Progress by elevating the feet, then moving to tuck front-lever rows.
Final Takeaway
A complete calisthenics back workout balances vertical pull (lats) with horizontal pull (mid-back), trains scapular control as a foundation, and progresses through tempo, ROM, and unilateral variations — not just rep count. Run the A/B split twice a week, treat scap pulls and Y-T-Ws as non-negotiable, and progress one lever at a time. Twelve weeks of strict execution will outbuild most weighted back routines, and you never have to load a plate. For the foundation skill that gates this whole system, see our pull-up progression guide, and pair this with our calisthenics push workout for a balanced upper-body week.
Sources
- Schoenfeld BJ et al. The Effect of Grip Width and Hand Orientation on Muscle Activity During Pull-ups and the Lat Pull-down. JSCR, 2014. Source.
- ACE Fitness — Weight Lifting Tempo & Sets. Source.

Pingback: How to Do a Pullup: Proper Form, Step by Step (2026)