
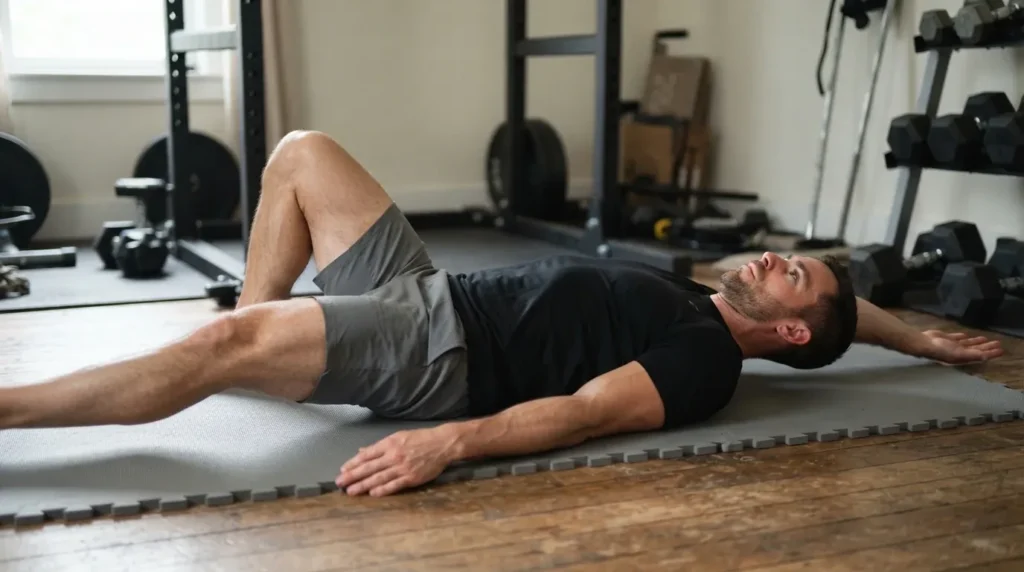
Bodyweight HIIT Workout Plan: 4 Weeks From Beginner to Advanced
TL;DR — How Does This Bodyweight HIIT Plan Work?
This bodyweight HIIT workout plan runs 4 weeks with 3 training days per week, progressing from 20-second work intervals at RPE 6 to 35-second intervals at RPE 9. No equipment needed. Each week increases intensity through longer work periods, shorter rest, and harder exercise variations. Download the free PDF below to start today.
RPE stands for Rate of Perceived Exertion – a 1-to-10 scale where 1 is lying on the couch and 10 is absolute maximum effort. You will use RPE targets throughout this plan to gauge intensity without needing a heart rate monitor.
Table of contents
What Makes a Good Bodyweight HIIT Plan?
An effective bodyweight HIIT plan pairs timed high-intensity intervals of compound bodyweight movements with structured weekly progression. Not just the same circuit copy-pasted four times. The intervals get harder, the rest gets shorter, and the exercises demand more from you each week.
HIIT – high-intensity interval training – alternates between bursts of near-maximum effort and brief recovery periods. During work intervals, your heart rate should hit 80–95% of your estimated maximum (Source: ACSM, Guidelines for Exercise Testing and Prescription, 11th ed.). That is the zone where metabolic and cardiovascular adaptations happen fastest.
Why does progression matter? Your body adapts. A circuit that gassed you in Week 1 becomes moderate effort by Week 3 if nothing changes. Research backs the time-efficiency angle: a 2017 meta-analysis found that HIIT produced similar fat-loss and body-composition results to moderate-intensity continuous training while requiring roughly 40% less training time (Source: Wewege et al., Obesity Reviews, 2017). But that efficiency only holds if the stimulus keeps pace with your fitness.
This plan uses a 4-week mesocycle. Three training days per week. Progressive overload comes from three levers: work-to-rest ratio shifts, round increases, and exercise complexity upgrades. That structure is what separates a plan from a random workout list. If you need to build a strength base before starting, try our beginner calisthenics routine first.
The 4-Week Plan at a Glance
This plan starts at 20 seconds of work with 40 seconds of rest in Week 1 (RPE 6–7), then ramps each week until you hit 35 seconds of work with only 25 seconds of rest by Week 4 (RPE 8–9). Rounds increase from 2 to 3 at the midpoint. Here is the full progression:
| Week | Work / Rest | Rounds | Exercises | RPE Target | Session Time |
|---|---|---|---|---|---|
| 1 | 20s / 40s | 2 | 6 | 6–7 | ~18 min |
| 2 | 25s / 35s | 2 | 6 | 7 | ~20 min |
| 3 | 30s / 30s | 3 | 6 | 7–8 | ~25 min |
| 4 | 35s / 25s | 3 | 6 | 8–9 | ~26 min |
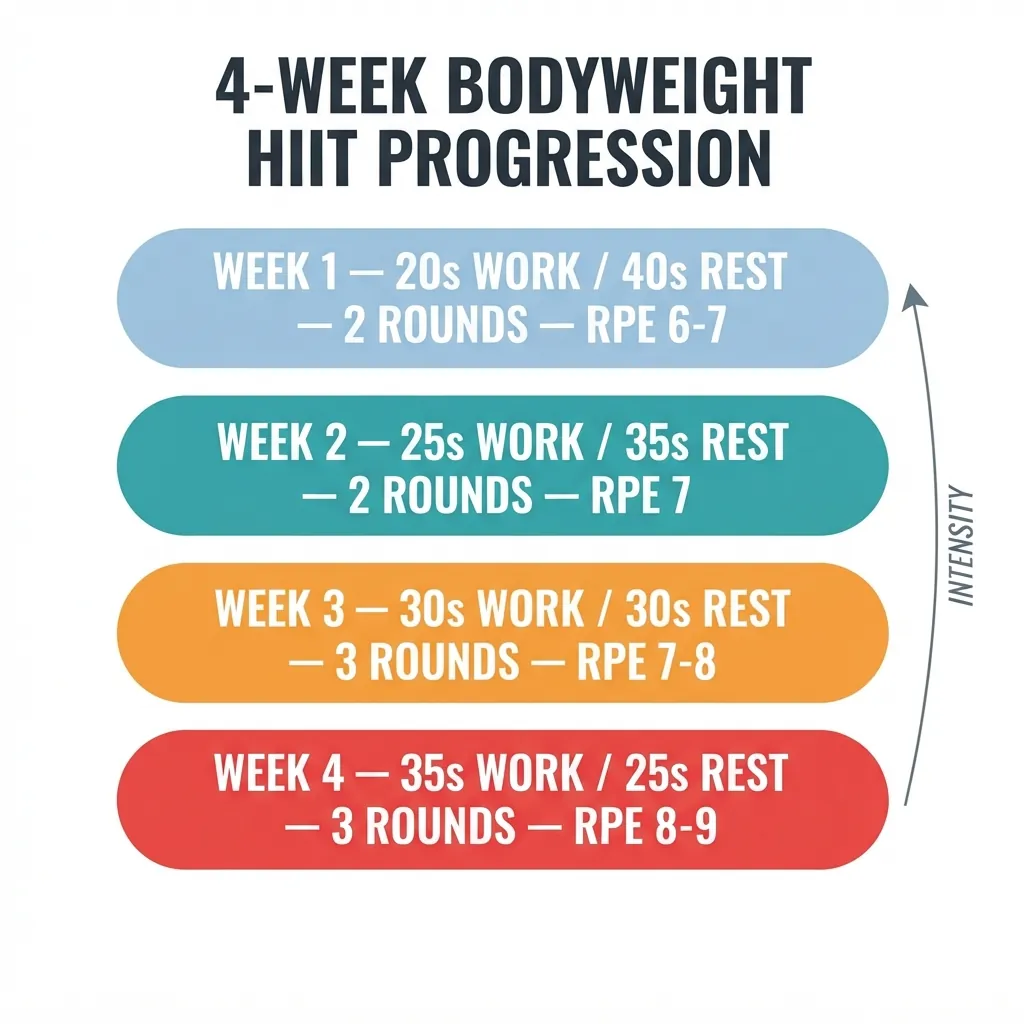
Every session follows the same template: 5-minute warm-up, the prescribed rounds, 3-minute cooldown.
How to Read the Schedule
Each week has three training days (Monday, Wednesday, Friday – or any three non-consecutive days). The columns above tell you everything:
- Work / Rest: How long you exercise and how long you recover between exercises. A dedicated interval timer app on your phone works fine.
- Rounds: How many times you cycle through all 6 exercises before you are done.
- RPE Target: Your subjective effort level during work intervals. Use these anchors:
| RPE | Feels Like |
|---|---|
| 5 | Moderate – you could hold a conversation |
| 6 | Somewhat hard – talking gets choppy |
| 7 | Hard – a few words at most |
| 8 | Very hard – you would rather not talk |
| 9 | Near max – counting down the seconds |
| 10 | Absolute max – unsustainable beyond 10s |
- Warm-up (5 min): Arm circles, leg swings, bodyweight squats, high-knee marching. Get your joints moving and your heart rate above resting.
- Cooldown (3 min): Walk in place, standing quad stretch, chest doorway stretch, deep breathing.
- Rest days: Tuesday, Thursday, Saturday, Sunday. Not optional – see the Recovery section below.
Week 1 – Build the Base (RPE 6–7)
Week 1 uses 20-second work intervals with 40-second rest across 2 rounds of 6 exercises, targeting RPE 6–7. Sessions run approximately 18 minutes plus warm-up and cooldown. The goal is to learn the movement patterns and establish a baseline intensity that challenges you without crushing you.
Day 1 – Full Body
- Squat – Feet shoulder-width, push hips back, descend until thighs are parallel. Drive through your whole foot.
- Push-Up (knees or standard) – Hands just outside shoulder-width. Lower your chest to the floor. Keep your core braced.
- Reverse Lunge (alternating) – Step back, drop the rear knee toward the floor, push through the front heel to return.
- Plank Hold – Forearms on the floor, body in a straight line. Squeeze your glutes. Hold for the full 20 seconds.
- High Knees – Drive your knees to hip height at a jogging pace. Stay on the balls of your feet.
- Glute Bridge – Lie on your back, feet flat. Press hips toward the ceiling, squeeze at the top, lower with control.
Day 2 – Lower-Body Focus
- Bodyweight Squat – Same form as Day 1. Focus on depth.
- Lateral Lunge (alternating) – Step wide to one side, bend that knee, keep the opposite leg straight. Push back to center.
- Calf Raise – Stand on the edge of a step or flat floor. Rise onto your toes, pause at the top, lower slowly.
- Wall Sit – Back flat against a wall, thighs parallel to the floor. Hold for 20 seconds.
- Step-Up (alternating, use a sturdy chair or low step) – Drive through the top foot. Control the descent.
- Lying Leg Raise – Flat on your back, legs straight. Raise both legs to 90 degrees, lower slowly without arching your back.
Day 3 – Upper Body + Core
- Push-Up (knees or standard) – Same cues as Day 1.
- Plank Shoulder Tap – In a high plank, tap your left shoulder with your right hand. Alternate. Minimize hip sway.
- Tricep Dip (using a chair or step) – Hands behind you on the edge, lower until elbows hit 90 degrees, press up. Consider a sturdy dip station if you want a deeper range of motion at home.
- Superman Hold – Lie face down, lift arms and legs off the floor. Hold for the full interval.
- Mountain Climber – High plank position. Drive knees to chest in a running motion. Keep hips level.
- Dead Bug – On your back, arms extended toward the ceiling, knees at 90 degrees. Lower opposite arm and leg toward the floor. Alternate sides.
Week 2 – Increase Density (RPE 7)
Week 2 shifts to 25-second work intervals with 35-second rest, keeping 2 rounds but introducing one harder exercise variation per session. The shorter rest window means less time for your heart rate to drop between exercises. You should feel the difference in rounds 1 and 2 compared to last week.
What changed and why: Five extra seconds of work and five fewer seconds of rest might sound minor. It is not. The total work-to-rest ratio moved from 1:2 to roughly 5:7. Your cardiovascular system has to recover faster. That progressive density is what drives adaptation.
Day 1 – Full Body: Replace Squat with Squat Pulse (3 pulses at the bottom before standing). Replace High Knees with Skater Hops (lateral bounds landing on one foot). All other exercises remain the same.
Day 2 – Lower-Body Focus: Replace Wall Sit with Wall Sit with Calf Raise (alternate heel raises while holding the sit). Replace Calf Raise with Single-Leg Calf Raise (alternating). Other exercises unchanged.
Day 3 – Upper Body + Core: Replace Plank Shoulder Tap with Plank Walk-Out (from standing, walk hands out to plank, walk back, stand). Replace Dead Bug with Bicycle Crunch. Other exercises unchanged.
Week 3 – Add Volume (RPE 7–8)
Week 3 jumps to 3 rounds with equal 30-second work and rest intervals, pushing sessions to roughly 25 minutes and RPE 7–8. This is the biggest single-week increase in the plan. The added round means 50% more total work volume than Weeks 1 and 2. If you need to drop to 2 rounds on your first attempt, that is fine – add the third round by the second session.
Day 1 – Full Body: Replace Squat Pulse with Jump Squat (land softly, reset between reps). Replace Glute Bridge with Single-Leg Glute Bridge (alternating). Replace Push-Up with Standard Push-Up (no knees) if you were using the regression.
Day 2 – Lower-Body Focus: Replace Bodyweight Squat with Bulgarian Split Squat (rear foot on a chair). Replace Step-Up with Lunge to Knee Drive (forward lunge, drive the rear knee up as you stand). Training on a hard floor for this many ground-based reps is easier on the knees with A thick exercise mat underneath you.
Day 3 – Upper Body + Core: Replace Mountain Climber with Burpee (no push-up, just squat-thrust to standing). Replace Superman Hold with Superman Pulse (lift and lower continuously).
This is where most “20-minute HIIT” programs land in terms of session length. The difference is that you earned this duration through 2 weeks of preparation, not by jumping in cold. For more circuit-style conditioning work, see our bodyweight circuit training guide.
Week 4 – Peak Intensity (RPE 8–9)
Week 4 peaks at 35-second work intervals with only 25-second rest over 3 rounds, using the most demanding exercise progressions in the plan. The work-to-rest ratio is now 7:5 – you are working longer than you are resting. Sessions land around 26 minutes of interval work.
Day 1 – Full Body: Replace Jump Squat with Squat Jump Tuck (tuck knees at the peak). Replace Skater Hops with Lateral Bound to Stick (hold the landing for 1 second). Replace Standard Push-Up with Push-Up to Shoulder Tap.
Day 2 – Lower-Body Focus: Replace Bulgarian Split Squat with Jumping Lunge (alternating). Replace Lunge to Knee Drive with Reverse Lunge to Hop. Replace Single-Leg Calf Raise with Pogo Hops (quick, low-amplitude ankle bounces).
Day 3 – Upper Body + Core: Replace Burpee (no push-up) with Full Burpee (with push-up at the bottom). Replace Plank Walk-Out with Plank Up-Down (forearm to high plank, alternating lead arm). Replace Bicycle Crunch with V-Up.
After completing Week 4, you have two solid options. Repeat the cycle starting at Week 2 intensity for a second block. Or transition into a structured strength program – a calisthenics workout plan pairs well because the exercises overlap and you already have the conditioning base. For a structured 28-day progression, check our 28-day calisthenics challenge.
Exercise Regression and Progression Table
Every exercise in this plan has an easier and harder version so you can match the movement to your current fitness level. Use this table to swap exercises within any week. If the standard version feels too easy at your target RPE, move right. Too hard, move left.
| Exercise | Beginner Regression | Standard | Advanced Progression |
|---|---|---|---|
| Push-Up | Knee Push-Up | Standard Push-Up | Push-Up to Shoulder Tap or Clap Push-Up |
| Squat | Half Squat (partial range) | Full Bodyweight Squat | Jump Squat or Squat Jump Tuck |
| Lunge | Stationary Lunge (no step) | Reverse Lunge | Jumping Lunge |
| Plank | Knee Plank | Forearm Plank | Plank Up-Down or Plank Walk-Out |
| Burpee | Squat Thrust (no jump, no push-up) | Squat Thrust to Stand | Full Burpee (with push-up + jump) |
| Mountain Climber | Slow Mountain Climber (step, not hop) | Standard Mountain Climber | Cross-Body Mountain Climber (fast) |
| Glute Bridge | Two-Leg Glute Bridge (short hold) | Glute Bridge with 2s pause | Single-Leg Glute Bridge |
| Core (Dead Bug/V-Up) | Dead Bug (slow tempo) | Bicycle Crunch | V-Up |
| Calf Raise | Two-Leg Calf Raise (flat floor) | Single-Leg Calf Raise | Pogo Hops |
| Hip Hinge (Superman) | Superman Hold (3s) | Superman Pulse | Back Extension (if bench available) |
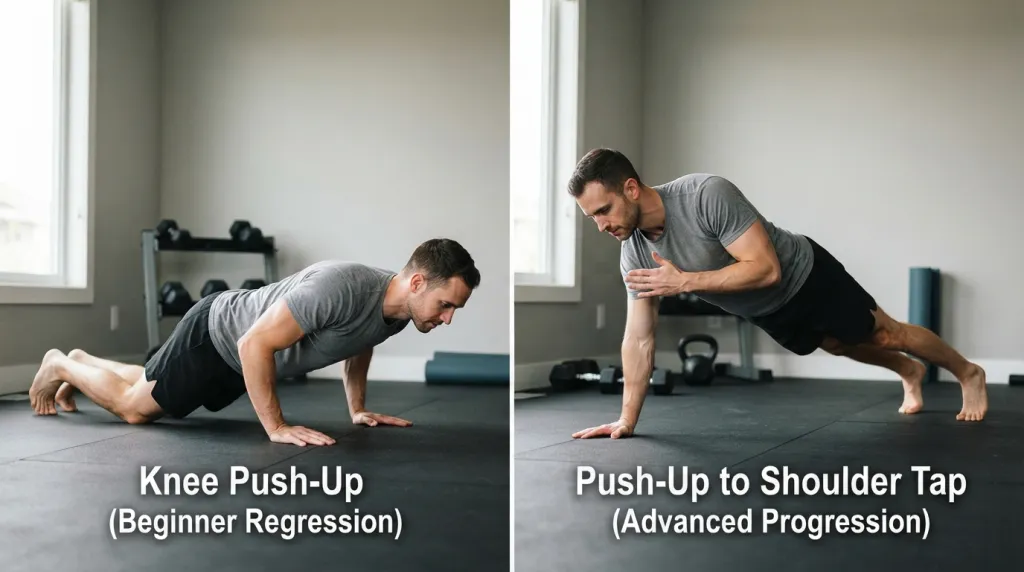
The regression column is not a lesser workout. Doing knee push-ups at RPE 8 is more productive than butchering standard push-ups at RPE 5 with broken form. Match the variation to your prescribed intensity, not your ego. Readers who find Week 1 regressions still too challenging should consider our beginner calisthenics routine to build a foundation first.
Recovery Day Programming
Rest days in this plan are not passive. Schedule 15–20 minutes of light walking or mobility work on off days to improve recovery between HIIT sessions. Active recovery keeps blood flowing to fatigued muscles without adding training stress.
Here is what that looks like:
- Tuesday / Thursday: 15-minute walk at a conversational pace, plus 5 minutes of hip and ankle mobility (deep squat hold, 90/90 hip stretch, ankle circles).
- Saturday: 20-minute easy movement – yoga flow, a bike ride, swimming, whatever you enjoy that keeps your heart rate under RPE 4.
- Sunday: Full rest or a 10-minute stretching routine.
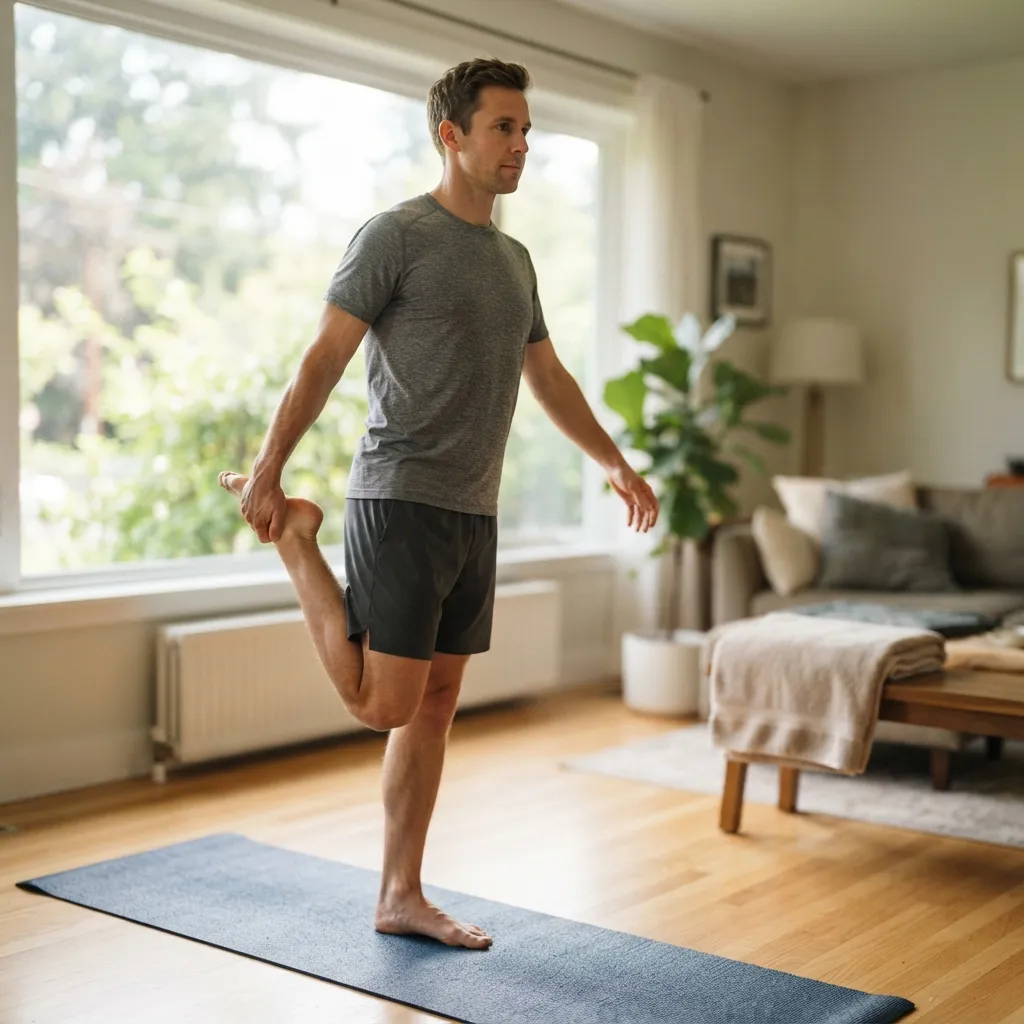
Why bother? HIIT creates significant metabolic and muscular stress. The adaptations you want – better oxygen delivery, stronger muscle contractions, improved work capacity – happen during recovery, not during the workout itself. Skipping recovery or adding extra sessions is counterproductive. The ACSM cautions against increasing HIIT session frequency beyond the prescribed level, as it “will likely lead to overtraining and/or injury” (Source: ACSM, Guidelines for Exercise Testing and Prescription, 11th ed.). For more variety on off days, browse our fun workouts at home list.
How Does HIIT Compare to Calisthenics Training?
HIIT and calisthenics overlap in exercises but differ in goals. HIIT prioritizes heart-rate elevation and metabolic conditioning. Calisthenics targets strength progression, movement skill, and muscle control. You can do push-ups in both, but a calisthenics session uses them to build toward a harder progression (like a pseudo-planche push-up), while a HIIT session uses them to keep your heart rate at 80%+ of max.
The two complement each other well. This HIIT plan builds the cardiovascular base and muscular endurance that make calisthenics skill work sustainable. Conversely, calisthenics strength makes your HIIT exercises more powerful – a stronger squat means a higher, more explosive jump squat.
If you are already following a calisthenics workout plan, slot 1–2 of these HIIT sessions into your week as conditioning days. If you are starting from this HIIT plan, the transition into structured calisthenics training is natural – the exercises are largely the same, just applied differently.
See our bodyweight circuit training guide for a format that sits between HIIT and traditional calisthenics. Our boot camp workout guide uses similar interval structures too.
Download the Free PDF
Download the complete 4-week bodyweight HIIT plan as a single-page PDF you can save to your phone or print. It includes all 4 weeks of programming, every exercise with its regression and progression, RPE targets per week, and the work/rest intervals.
Download the Bodyweight HIIT Workout Plan PDF →
No email sign-up required. Save it, screenshot it, print it – whatever keeps it accessible when you train.
FAQ
How many times a week should you do HIIT?
Two to three times per week is the right range for most people. The ACSM recommends vigorous-intensity exercise on 3 days per week for at least 20 minutes as one pathway to meet physical activity guidelines (Source: ACSM, Guidelines for Exercise Testing and Prescription, 11th ed.). This plan uses 3 days specifically because it allows 48 hours of recovery between sessions. Daily HIIT drives diminishing returns: elevated cortisol, accumulated fatigue, and higher injury risk without proportional fitness gains.
Is 20 minutes of HIIT per day enough?
Yes, for general fitness and fat loss. This plan’s sessions range from 18 to 26 minutes, and research supports that HIIT achieves similar cardiovascular and body-composition improvements to longer moderate-intensity sessions in roughly 40% less time (Source: Wewege et al., Obesity Reviews, 2017). Quality of intervals matters more than total duration. Twenty focused minutes at RPE 7–9 outperforms 45 minutes of half-effort cardio.
Can you do HIIT with just bodyweight?
Absolutely. Compound bodyweight movements – burpees, squat jumps, mountain climbers, high knees – elevate your heart rate into the 80–95% max HR zone that defines HIIT (Source: ACSM). No dumbbells, kettlebells, or machines required. This entire 4-week plan uses nothing but your bodyweight and a floor. A chair or step helps for a few exercises but is optional. For more fat-loss exercises at home that require no equipment, see our dedicated guide.
Is HIIT better than steady-state cardio for fat loss?
Both work. HIIT is more time-efficient. A meta-analysis of 13 studies found no significant difference in total fat loss between HIIT and moderate-intensity continuous training, but HIIT achieved those results in about 40% less weekly training time (Source: Wewege et al., Obesity Reviews, 2017). HIIT also produces greater excess post-exercise oxygen consumption (EPOC) – your body burns additional calories after the workout as it restores itself to baseline. A 2024 study measured EPOC at 66 kcal after HIIT versus 54 kcal after steady-state exercise of equal caloric expenditure (Source: Jiang et al., Scientific Reports, 2024). The practical difference is real but modest. Best approach: use HIIT for 2–3 sessions per week and add 1–2 steady-state walks or jogs for volume.
What is the difference between HIIT and circuit training?
HIIT uses timed intervals at near-maximum effort with defined rest periods. Circuit training moves through a series of exercise stations, often with minimal rest, but the intensity can be anything from light to hard. The difference is the intent: HIIT prescribes specific work-to-rest ratios and demands effort above 80% max HR during work bouts. Circuit training prescribes a sequence of exercises and a structure, but not necessarily a heart-rate target.
They overlap. A bodyweight circuit training session done at high intensity with timed rest is effectively HIIT. This plan is structured as circuits performed at HIIT intensity.
Can beginners do HIIT every day?
No. Beginners need at least 48 hours between HIIT sessions. Supervised HIIT programs average a 12.9% dropout rate – and that is in structured, coached settings (Source: Taylor et al., International Journal of Behavioral Nutrition and Physical Activity, 2023). Unsupervised programs see far worse adherence, partly because people go too hard, too often, and burn out. Week 1 of this plan is built for beginners: low RPE, generous rest intervals, regression options for every exercise. Three sessions per week with four recovery days is the right starting point.
Sources
- Wewege, M. et al. (2017). “The effects of high-intensity interval training vs. moderate-intensity continuous training on body composition in overweight and obese adults: a systematic review and meta-analysis.” Obesity Reviews, 18(6), 635–646. onlinelibrary.wiley.com
- ACSM. Guidelines for Exercise Testing and Prescription, 11th Edition. Wolters Kluwer. wolterskluwer.com
- ACSM. Physical Activity Guidelines Resources. acsm.org
- Jiang, L., Zhang, Y., Wang, Z., Wang, Y. (2024). “Acute interval running induces greater excess post-exercise oxygen consumption and lipid oxidation than isocaloric continuous running in men with obesity.” Scientific Reports, 14, 10438. nature.com
- Taylor, J.L. et al. (2023). “Rates of compliance and adherence to high-intensity interval training: a systematic review and meta-analyses.” International Journal of Behavioral Nutrition and Physical Activity, 20, 142. pmc.ncbi.nlm.nih.gov
- ACSM. Guidelines for Exercise Testing and Prescription, 11th ed., Ch. 6 (heart rate zone reference: 80–95% age-predicted HRmax for high-intensity intervals).