
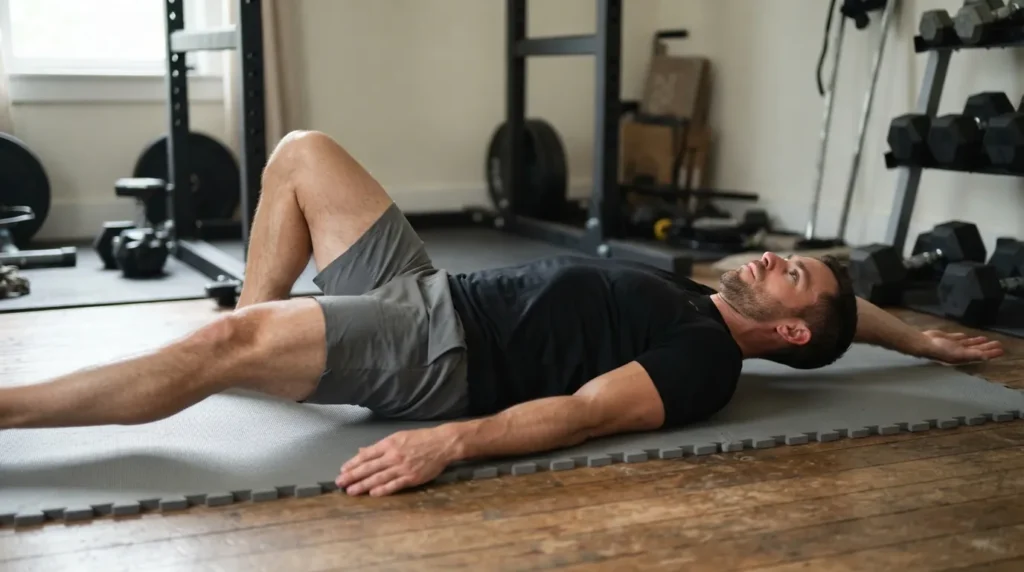
Dead Bug Exercise: Form, 5-Level Progression & Muscles Worked
Gymnase Tips is reader-supported. Some links may be Amazon affiliate links; if you buy through them we may earn a small commission at no extra cost to you.
TL;DR — How Do You Do the Dead Bug Exercise?
The dead bug exercise is a supine core stability drill where you lie face-up, extend opposite arm and leg while bracing your core, then return and switch sides. This guide covers correct form with a 3-1-3 tempo prescription, a 5-level progression ladder from heel slides to weighted variations, EMG-backed muscle activation data, and a back-pain protocol. Whether you are rehabbing a bad back or preparing for heavy squats, the dead bug earns its place in your program.
Table of contents
What Is the Dead Bug Exercise?
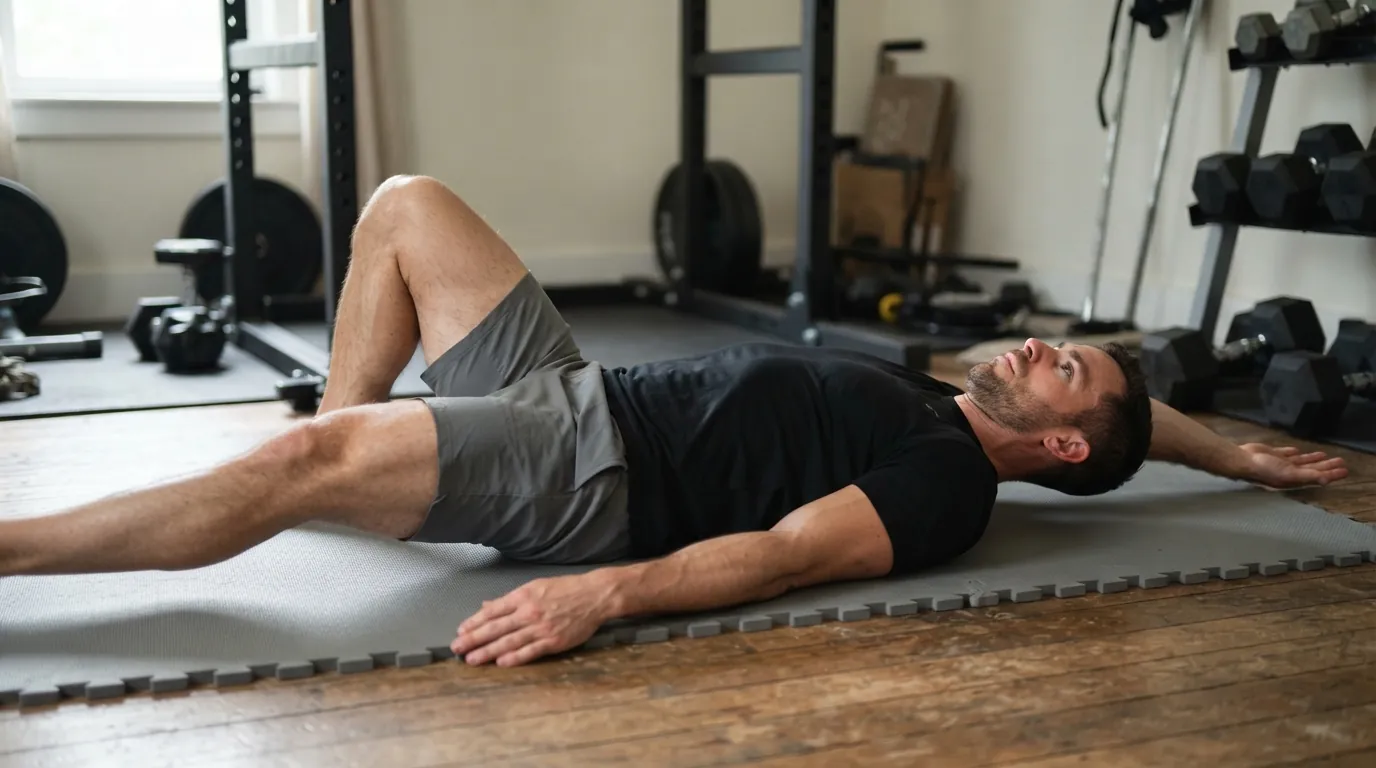
The dead bug exercise is an anti-extension core drill performed on your back with arms reaching toward the ceiling and knees bent at 90 degrees. You lower opposite arm and leg toward the floor while keeping your lower back pinned flat. The movement trains your core to resist lumbar extension under load, which is the same demand your spine faces during squats, deadlifts, and everyday lifting.
Trainers prescribe it for beginners learning core control, athletes building bracing strength, and rehab patients recovering from low back injuries. The NSCA classifies it as a lumbopelvic stability exercise that supports both performance and injury prevention (Source: Mullane et al., Strength and Conditioning Journal, 2019).
What Muscles Does the Dead Bug Work?
The dead bug primarily targets the transverse abdominis (TrA), rectus abdominis, and internal and external obliques, with secondary work from the erector spinae, hip flexors (psoas and iliacus), and the diaphragm through coordinated breathing. It is one of the few exercises that activates all four abdominal muscle groups simultaneously (Source: Harvard Health, 2026).
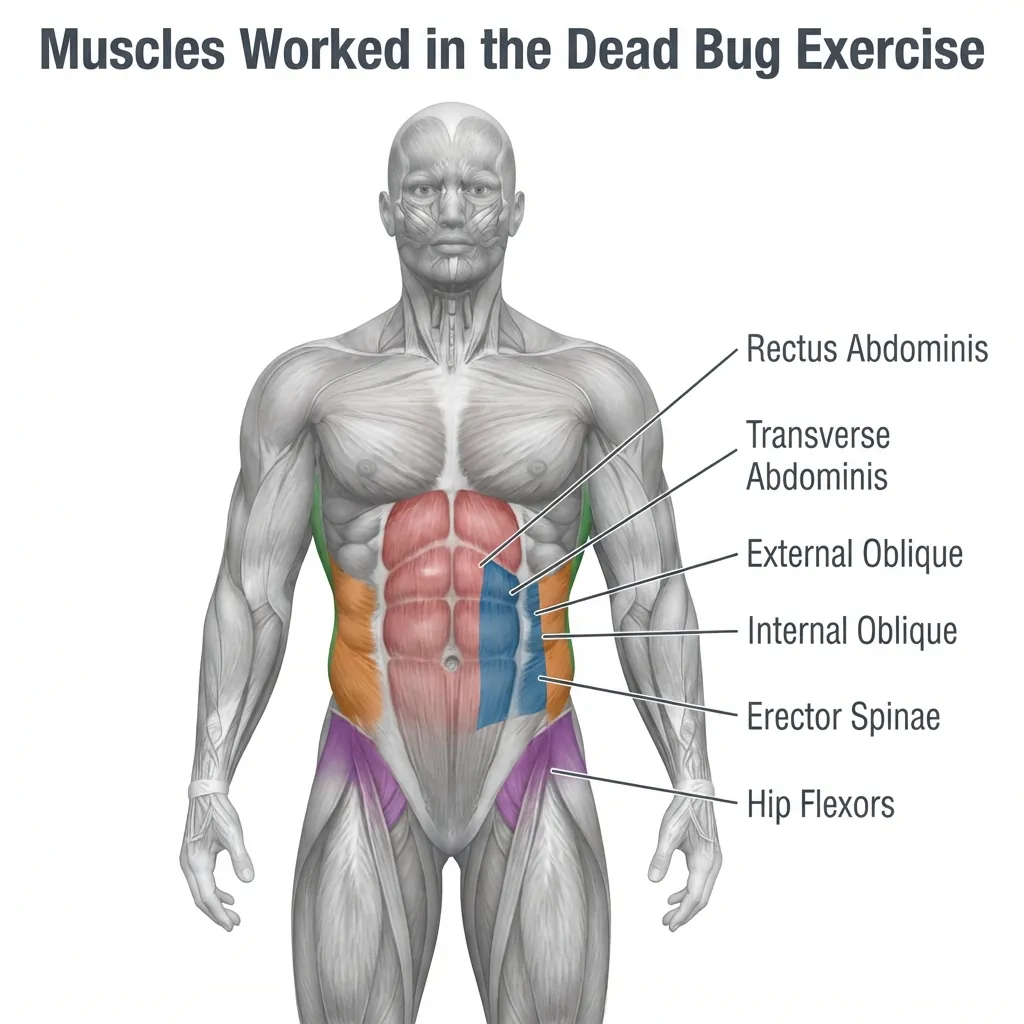
Here is how each muscle contributes:
- Transverse abdominis (TrA): The deep corset muscle that stabilizes the lumbar spine. A 2024 ultrasound study measured TrA thickness increases of 99.6% above resting values during dead bugs performed with an abdominal hollowing cue (Source: Tsartsapakis et al., J. Funct. Morphol. Kinesiol., 2024).
- Rectus abdominis: Resists extension as you lower your limbs. Works isometrically rather than through the spinal flexion crunches demand.
- Internal and external obliques: Control rotation and lateral stability. The same 2024 study found the bird dog produced significantly greater internal oblique activation than the dead bug (p < 0.001), but the dead bug remains effective for oblique training in a safer spinal position.
- Erector spinae and multifidus: Co-contract to stabilize the spine. Dead bugs produced greater multifidus thickness than beast crawls (p = 0.008) and planks (p = 0.032) in that same study.
- Hip flexors (psoas, iliacus): Control the lowering and returning of each leg.
- Diaphragm: Coordinating breath with movement builds intra-abdominal pressure, the same bracing mechanism used in heavy compound lifts.
How to Do the Dead Bug Exercise (Step by Step)
To do the dead bug correctly, lie face-up on a exercise mat with arms extended straight toward the ceiling and knees bent at 90 degrees, shins parallel to the floor. Press your lower back firmly into the ground and hold that contact throughout every rep.
- Set your base. Lie on your back. Raise both arms straight above your shoulders. Lift your legs so your hips and knees form 90-degree angles.
- Brace your core. Exhale and flatten your lower back against the floor. Imagine crushing a grape under your lumbar spine. This posterior pelvic tilt is the position you maintain for the entire set.
- Extend opposite limbs. Inhale, then exhale as you slowly lower your right arm overhead and your left leg toward the floor. Take 3 seconds to extend. Do not let your back arch.
- Pause at the bottom. Hold for 1 second with your arm and leg hovering just above the floor. Your lower back stays glued down.
- Return and switch. Inhale as you bring both limbs back to the start over 3 seconds. That is one rep. Repeat on the other side.
The 3-1-3 tempo (3 seconds down, 1-second hold, 3 seconds back) is what separates effective dead bugs from the sloppy, rushed version most people do. Seven seconds per rep forces your deep stabilizers to work. Cutting that tempo in half cuts the training effect in half.
4 Common Dead Bug Mistakes
The most common dead bug mistake is letting the lower back arch off the floor, which shifts load from the core to the lumbar spine. Rushing reps, flaring the rib cage, and holding your breath round out the top four errors that kill the exercise’s effectiveness.
Arching the Lower Back
This is the mistake that turns a safe exercise into a back aggravator. If you cannot keep your lower back flat, the weight of your extending limbs is pulling your spine into extension unchecked. Fix: use the “crush a grape” cue. If that fails, regress to heel slides (Level 1 below) until you build enough TrA strength to maintain the position.
Rushing the Reps
Speed kills the dead bug. Google’s own AI overview flags this one, and for good reason. Fast reps let momentum do the work. Use the 3-1-3 tempo. Count out loud if you have to.
Flaring the Rib Cage
When the ribs pop up, the diaphragm disengages and the obliques stop working. Before each rep, exhale hard and pull your ribs down toward your pelvis. They should stay there.
Holding Your Breath
Breathing under tension is half the point of this exercise. Exhale during the extension (exertion phase), inhale during the return. This rhythm creates intra-abdominal pressure that stabilizes the spine while training diaphragmatic control you will use during squats and deadlifts.
Dead Bug Progression: 5 Levels From Beginner to Advanced
Progress the dead bug across five levels: heel slides, standard form, single-side iso holds, resistance bands, and weighted variations. Move up only when you can complete the prescribed sets and reps with zero lower-back compensation. Rushing the progression is worse than staying at a lower level.
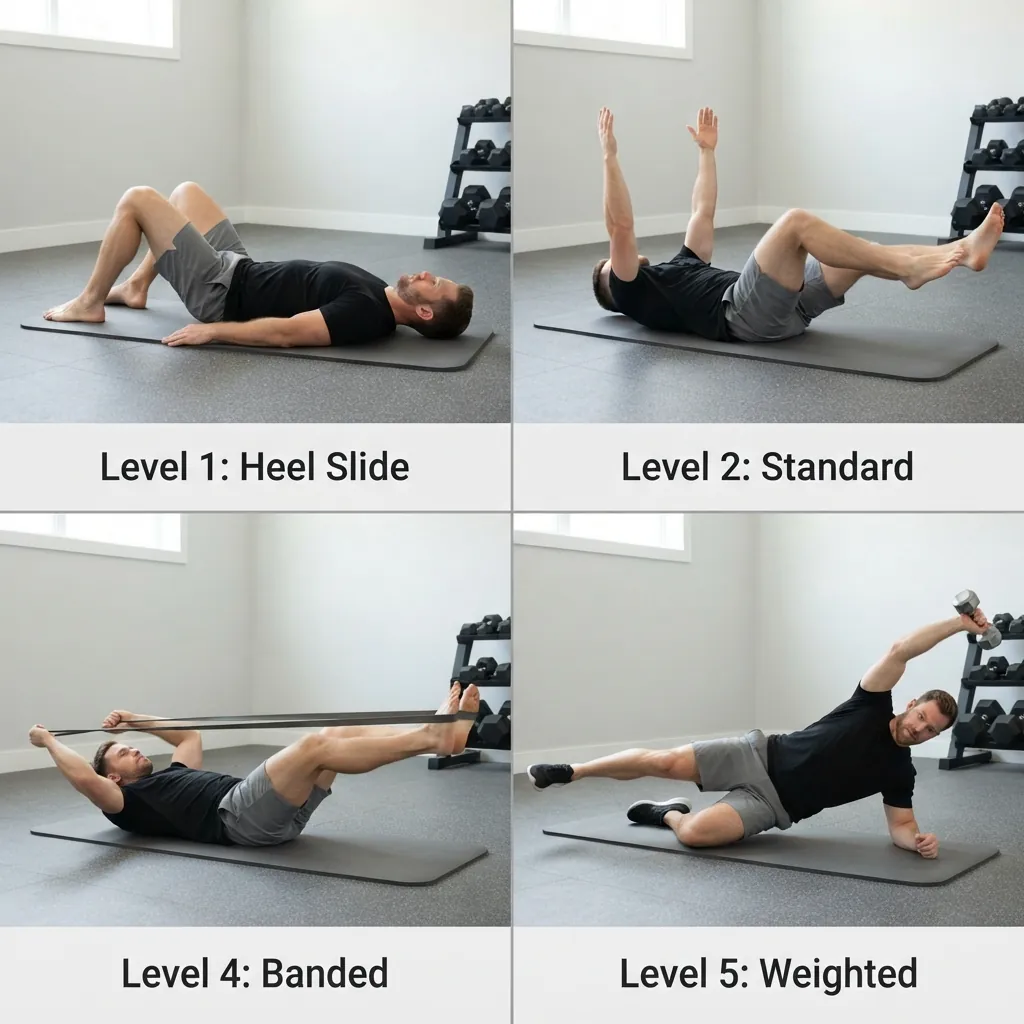
Level 1 — Heel Slides (Regression)
For true beginners or anyone returning from a back injury. Lie in the starting position but keep your feet on the floor with knees bent. Slide one heel along the floor to extend the leg, then pull it back. Arms stay pointed at the ceiling and do not move.
Advance when: You can complete 3 sets of 12 reps per side with your lower back flat the entire time.
Level 2 — Standard Dead Bug
The classic contralateral pattern described in the step-by-step section above. Opposite arm and opposite leg extend simultaneously while you maintain the 3-1-3 tempo.
Advance when: You complete 3 sets of 12 reps per side at a controlled 3-1-3 tempo with no back arch.
Level 3 — Single-Side Iso Hold
Extend one arm and the opposite leg and hold for 5 seconds at the bottom position while the non-working limbs stay locked at 90 degrees. This builds time under tension and exposes any side-to-side imbalances.
Advance when: You hold 4 sets of 8 reps per side with 5-second holds and zero compensation.
Level 4 — Resistance Band Dead Bug
Anchor a loop resistance band behind your head or loop it around your feet. The band adds constant tension through the full range, forcing the core to work harder at the end range where most people lose control. For more banded core work, see our resistance band exercises guide.
Advance when: You complete 3 sets of 10 reps per side without the band pulling you into extension.
Level 5 — Weighted Dead Bug
Hold a light dumbbell (5-15 lb) in the extending hand, or strap on ankle weights for the leg. Added load demands more from the TrA and rectus abdominis. Keep the 3-1-3 tempo. If your form breaks, the weight is too heavy.
Program: 3 sets of 8 reps per side. Focus on control, not load.
Dead Bug vs Bird Dog vs Plank vs Hollow Hold
The dead bug is the safest core exercise for people with back pain because it keeps the spine in a neutral supine position with zero compression. Bird dogs produce the highest TrA activation among common core exercises. Planks build isometric endurance under compression. Hollow holds suit advanced athletes training anti-flexion for gymnastics transfer.
| Factor | Dead Bug | Bird Dog | Plank | Hollow Hold |
|---|---|---|---|---|
| Primary muscles | TrA, rectus abdominis | TrA, multifidus, glutes | Rectus abdominis, obliques | Rectus abdominis, hip flexors |
| Difficulty (1-5) | 2 | 2 | 3 | 4 |
| Spine safety | Highest — supine, no load | High — quadruped | Moderate — compression | Low — lumbar flexion risk |
| Best for | Back pain, beginners | Posterior chain, rehab | Endurance, general fitness | Gymnastics, advanced core |
| TrA activation (hollowing) | 99.6% above rest | 106% above rest | Lower than both | Not measured |
| Equipment | None (optional band/weight) | None | None | None |
The TrA activation data comes from ultrasound measurements during hollowing-cued exercises (Source: Tsartsapakis et al., J. Funct. Morphol. Kinesiol., 2024). Bird dogs win on raw TrA recruitment, but you perform them on hands and knees, which some people with acute back pain cannot tolerate. Dead bugs let you train the same muscles while lying flat. Use both if you can. If you can only pick one and your back hurts, pick the dead bug.
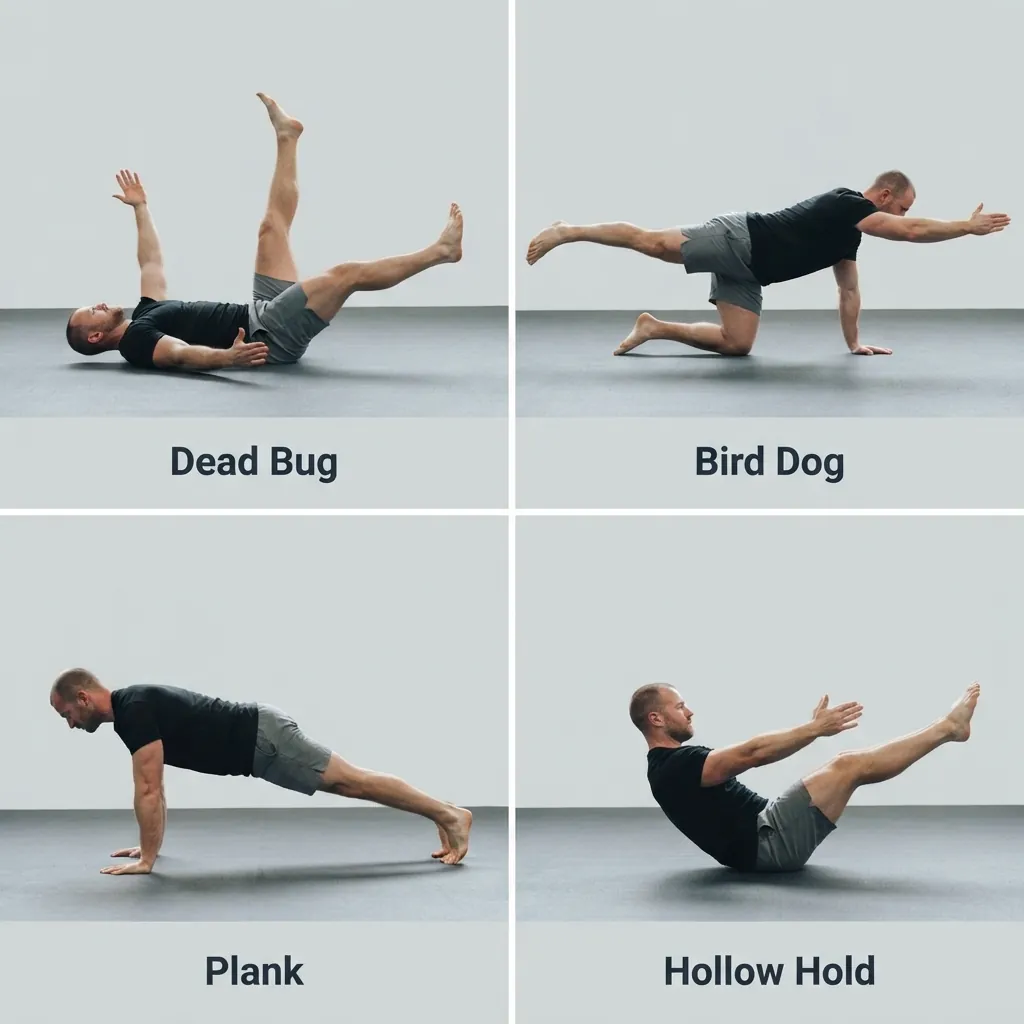
For a full core workout routine that programs these together, see our calisthenics core workout guide.
Dead Bug for Back Pain: A 3-Step Protocol
Dead bugs are one of the most commonly prescribed exercises for lower back pain because they strengthen the deep core without loading the spine. Low back pain affects an estimated 619 million people globally (Source: WHO, 2020), and physical therapists regularly use supine anti-extension drills as frontline treatment. Harvard Health specifically recommends the dead bug for older adults and anyone with back issues because it can be modified for any limitation (Source: Harvard Health, 2026).
Follow this 3-step protocol:
- Start at Level 1 (heel slides). Work within a pain-free range only. If extending your leg fully causes discomfort, shorten the range. Three sets of 8-10 reps per side, 3 times per week.
- Progress to Level 2 (standard dead bug) when pain-free for 2 weeks. The contralateral arm-leg pattern adds demand. Maintain the posterior pelvic tilt throughout.
- Add tempo before adding resistance. Use the 3-1-3 count at Level 2 before moving to bands or weights. Tempo increases time under tension without increasing load, which is what a recovering spine needs.
When to see a doctor or physical therapist: If you experience pain radiating down your leg, numbness or tingling in your feet, or pain that worsens rather than improves after two weeks of consistent dead bug training, stop and get evaluated. These are red flags for nerve involvement that dead bugs alone will not fix.
Benefits of the Dead Bug Exercise
The dead bug builds deep core stability, reduces back pain risk, and improves the contralateral coordination pattern your body uses for walking, running, and lifting. Here are the specific benefits:
- Strengthens the TrA without spinal compression. Unlike crunches, which generate approximately 3,300 newtons of compressive force on the lumbar spine (Source: McGill, University of Waterloo), dead bugs keep the spine neutral and unloaded.
- Reduces lower back pain risk. Stronger deep core muscles resist the lumbar extension that causes most non-specific low back pain.
- Improves coordination. The contralateral movement pattern (opposite arm and leg) trains the same cross-body motor control used in walking and sprinting.
- Transfers to compound lifts. The bracing and breathing pattern mirrors what you need during squats and deadlifts.
- Scales for any fitness level. The 5-level progression means a post-surgery rehab patient and a competitive athlete can both get something from this exercise.
- Trains breathing under load. Coordinating exhale-on-exertion with core bracing builds diaphragmatic control that carries over to every other exercise.
For more on training the deep midline, see our guide to transverse abdominis exercises. If fat loss around the midsection is also a goal, pair this with our lower belly fat workout.
How to Program Dead Bugs Into Your Workout
Program dead bugs for 3 sets of 8-12 reps per side, 2-4 times per week, depending on your training level and where you are in the progression. Place them either in your warm-up as activation work or in a dedicated core block at the end of your session.
| Level | Sets x Reps | Tempo | Frequency |
|---|---|---|---|
| Beginner (Levels 1-2) | 3 x 8 each side | Controlled | 2-3x/week |
| Intermediate (Levels 2-3) | 3 x 12 each side | 3-1-3 | 3-4x/week |
| Advanced (Levels 4-5) | 3 x 8 each side | 3-1-3 | 2-3x/week |
Advanced trainees train dead bugs less often because banded and weighted variations create more fatigue per session. Recovery matters more as load increases.
Where in your workout: As a warm-up, dead bugs fire up the deep stabilizers before heavy lifts. In a core block, pair them with planks or bird dogs for 2-3 rounds. Either placement works. The worst placement is skipping them entirely.
Frequently Asked Questions
Are Dead Bugs Better Than Crunches?
For core stability and back safety, yes. Dead bugs activate the TrA, rectus abdominis, and obliques while keeping the spine neutral. Crunches produce higher peak rectus abdominis activation through spinal flexion, but that flexion generates roughly 3,300 newtons of lumbar compression (Source: McGill, University of Waterloo). If you have any history of back pain or care about long-term spinal health, dead bugs are the better choice.
Will Dead Bugs Flatten Your Stomach?
No. Dead bugs strengthen your core muscles, but they do not spot-reduce belly fat. No exercise does. A caloric deficit reduces body fat; dead bugs build the muscle underneath. Do both and you will see results. Do dead bugs alone and you will have a stronger core hidden under the same layer of fat.
How Many Dead Bugs Should I Do Per Day?
Three sets of 8-12 reps per side, but not daily. Train dead bugs 3-4 times per week with rest days between sessions. Daily training does not allow the core muscles to recover and adapt. Rest is when strength is built.
Why Does My Lower Back Hurt During Dead Bugs?
Your core is not maintaining the position. When the lower back arches off the floor, the lumbar spine absorbs the load instead of the abdominals. Fix this by regressing to heel slides (Level 1), using the posterior pelvic tilt cue, and shortening your range of motion. If pain radiates into your legs or worsens over time, see a doctor.
What Is the Difference Between Dead Bug and Bird Dog?
The dead bug is performed supine (face-up) and the bird dog is performed in a quadruped position (hands and knees). Research shows the bird dog produces greater TrA activation (106% vs 99.6% above resting thickness), but the dead bug is safer for people with back pain because the floor supports your spine (Source: Tsartsapakis et al., J. Funct. Morphol. Kinesiol., 2024). See the comparison table above for a full breakdown.
How Do You Make Dead Bugs Harder?
Follow the 5-level progression. Add single-side iso holds (Level 3), resistance bands (Level 4), or dumbbells and ankle weights (Level 5). Always master the current level before moving up. Adding difficulty before you own the position is how injuries happen.
Sources
- Mullane, M., Turner, A., and Bishop, C. “Exercise Technique: The Dead Bug.” Strength and Conditioning Journal, 41(5): 114-120, 2019. Read the study
- Tsartsapakis, I., Bagioka, I., Fountoukidou, F., and Kellis, E. “A Comparison between Core Stability Exercises and Muscle Thickness Using Two Different Activation Maneuvers.” Journal of Functional Morphology and Kinesiology, 9(2): 70, 2024. Read the study
- Harvard Health Publishing. “The many benefits of the ‘dead bug.'” Updated May 19, 2026. Read the article
- University of Waterloo, Faculty of Health. “He’s got our backs” (Stuart McGill spinal biomechanics research). Read the article
- World Health Organization. “Low back pain” fact sheet. 2023 (data from 2020). Read the fact sheet